by
Kraig J. Rice

Table Of Contents:
Table Of Contents:
Introduction
Purchase Your Supplies
Steps On How To Embed An Inanimate Object (steps 1-12)
Steps On How To Embed An Insect (steps 13-15)
Preparing Your Specimen (steps 16-19)
The Use of Alcohol In Plastic Embedding As A Hobby (steps 20-21)
Steps On How To Embed A Reptile, an Amphibian, or a Fish (steps 22-24)
Miscellaneous
Conclusion
One day while at the beach in a souvenir shop I saw a round key chain that caught
my eye. It was a tiny red crab embedded in clear plastic. There was a
hole drilled through the plastic at it's upper end. This was where the
metal part of the key chain connected to the plastic part. It was
beautifully done and was nearly irrestible to own. I did not buy it but
it brought back fond memories of when I was a kid. At one time in my
childhood I had an acquarium cage at home that had turtles and frogs in
it. I loved those little creatures and had fun playing with them.
I think that the appeal of owning this little red crab as an adult was because of
those fond memories. If I had bought that little red crab then I could
own it, enjoy it, and share it with friends- all without having to feed
it or give it a home to live in. It would remind me of a happy period
of time in my childhood.
My point is that there is a terrific appeal among the general public to
own little creatures embedded in plastic. These plastic articles can be
used to make key chains, paper weights, ash trays, conversation
pieces, etc. Or specimens can be embedded in plastic for science
projects and other uses. Or other items can be embedded in plastic to make
jewelry. No matter what the use-
you should find this hobby fulfilling and rewarding in many ways.
I had this hobby a few years ago and I hope that something I have to say here
will help you get started on this wonderful hobby.
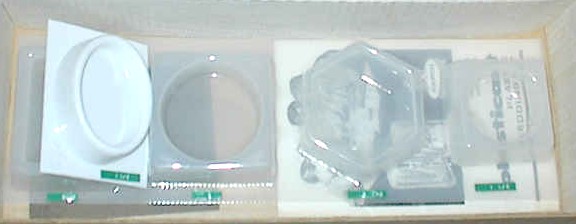
You need to find a hobby store in your area who carries plastic embedding
supplies. There are several items that you need in purchase in order to get started.
If you don't have such a store in your area then you may want to
purchase your supplies online.


Check the directions carefully on the can of resin that you buy. With a
can from one manufacturer you might have to add 8 drops of hardener
per half ounce of resin. On the other hand with a can from another manufacturer you have to add
only 3 or 4 drops of hardener per half ounce, etc. Resins vary from
manufacturer to manufacturer and thus the amount of hardener will also vary.


Some folks like to make
their own molds called latex molds. This is ok too except that they can
be kind of flimsy and you usually have to support a mold like this with
some kind of a frame. In my opinion these molds can leave impressions
in the plastic that look kind of tacky. Ask your hobby store owner about
this if you need further information on how to make latex molds.


The sixth item that you need is an instruction booklet explaining this
hobby in great detail. Many hobby stores sell a booklet that
explains some of the more popular techniques involved in plastic embedding practices.
The seventh item that you need is a bottle of alcohol for soaking and
preserving your larger specimens. I mention more about this in detail farther along in this
document.

The ninth item that you need is a needle and syringe for
injecting your large specimens. I mention more about this in detail farther along in this
document.
The tenth item that you need is some wet-dry sand paper.
I mention more about this in detail farther along in this
document.
The eleventh item that you need is a can of Brasso.
I mention more about this in detail farther along in this
document.
The twelfth thing that you need is a steady hand and a lot of
patience. Not necessarily in that order. I don't have
anything to say about this in detail any farther along in this document:)
I wanted to make an ash tray. But I didn't want anyone to put
cigarette ashes in my finished product. Rather, when it was done, I
thought that I could put small objects in it such as safety pins,
straight pins, buttons, etc.
To make this item I had some
beautiful glass marbles that I thought I would embed in plastic.
This would be around it's edges.
This would be an attractive work of art to me. So, let's go
through the procedure step by step that I used to embed these marbles
in plastic and make such a pretty finished product.
1. First of all I went out into my garage. Plastic resin puts off a
tremendous amount of odor and fumes while it is hardening so you need
to go to an isolated location where you don't have to breathe it.
Another location might be an isolated work shop or back storage shed
that is separate from your house. Anywhere where there is good
ventilation with no people or animal pets living is usually fine.
2. I spread a thick coating of newspapers on the work bench. Spilled plastic
is hard to clean up so it is good to use rags or newspapers to cover
the bench where you are working. That way, you can just throw them away
when you are finished.
Always wear old clothes (discardables) for this kind of a project. If
you are a young person- your mother won't appreciate you ruining your good school clothes.
If you are an adult- wearing your Sunday finest isn't the finest way to
go. If you slop liquid resin on your shirt or pants it won't wash off.
 Steps On How To Embed An Inanimate Object
I decided to use the "teach as you go method" in this
presentation. I think that it might be a little more interesting that
way. And I add comments on how and why I did certain things as I go along.
3. I picked the plastic mold that I wanted to use.
My goal was to pour the base layer. This is how I did it:
4. I got a small hand held liquid measuring utensil used in most
chemistry sets to measure amounts of liquid.
I poured one ounce of water from this utensil into a paper cup. On the
outside of the cup I drew an ink line at where the one ounce surface of
the water was located on the inside. Then I did the same at the two
ounce level, the three ounce level, and so on. When I was finished I had a paper cup that had horizontal
lines on it. I did this because it is important for you to know how much
resin you are going to use. You need to know this because you have to add
so many drops of hardener per ounce of resin used. You are measuring
ounces of liquid volume rather than ounces of weight. 16 ounces of
fluid equals one pint of liquid. Two pints equals one fluid quart. Or 32
fluid ounces equals one quart.
Then I poured water from the paper cup into the mold that I had chosen,
one half ounce at a time. When pouring plastic you want to pour it in stages,
or in layers. You never want to pour it all at once. If you do the plastic
will suck in and get deformed as it is drying. Then you can just throw
it all away because it is ruined.
I poured the water until
it was 1/4 of an inch thick on the bottom of the mold. I had measured out
a certain amount of water so that meant that I would have to measure
out the exact same amount of liquid plastic. Then I dumped the water out of the mold and
dried it thoroughly. I also dried the water out of the paper cup. A hair
dryer comes in handy here in getting rid of residual water droplets.
Now, if you can't find a small liquid measuring container then look at
the directions on the can of resin. Sometimes the manufacturer will
refer to the metal cap on top of the can of resin. For instance, the
manufacturer may state that three cap fulls of resin will equal 1/2
ounce of resin or something similar to that. Failing that you might want
to get an empty pint container and fill it with water. It holds 16 ounces
of water. Pour an equal amount of water from it into 16 identical paper
cups. Each cup will then contain one ounce of liquid. Then pour the contents of 8 of
those cups into the other 8 cups to get the 2 ounce level, etc.
Sometimes a manufacturer will afix a little plastic cup to the top of
it's larger can of plastic resin. This is a measuring cup as well as a
mixing cup. It sure makes things a lot more simple to use this and it's
a great incentive to purchase that can of resin over a brand of resin
that does not have one.
Many times the hobby store owner will have a little measuring cup like
that for sale amongst his other items as well.
5. I sprayed mold release on the mold liberally.

6. I opened the can of liquid resin and poured the right amount of
resin into the
paper cup. (For larger molds you will use more resin, for smaller molds
you will use less resin).
I was going by the marks on the outside of the cup.
Then I added the right amount of
drops of liquid hardener (or catalyst) to the resin.
Let's say, for example, three to eight drops total.
You have to count the drops so be precise. A partial drop does not count.
The general rule when you are starting out is to only pour out 1/2
ounce of resin into your mixing cup and add the few drops
of catalyst or hardener to it. This will give you a generalized idea
of how much resin you are going to need on your other layers. If it is
too thin then you can add extra resin when pouring the next layer.
I mixed it all up really well with a pencil and then poured the liquid
resin into the plastic mold. Your plastic will start hardening quickly.
Depending on the temperature, you should see results within 20 minutes
or so. The best thing to do is to leave it alone and just let it
harden overnight. A hot room temperature may cause it to set up a little faster
than it does with a cold room temperature. But, either way, it will set up.
There is a certain amount of shrinkage that comes along with the
hardening process so allow for this. If you are in a hurry you can pour
your second layer after 4 hours or so.
7. I then carefully placed each glass marble in place on top of the
base layer of hardened plastic making sure that the
side of each marble was away from the side of the mold. Note: if you
are embedding a medal, a charm from a charm braclet, a coin, etc. then
you will need to place the object face down. You must realize that the
bottom of the mold, in most cases, will be the top of your finished product.
8. My next step was to pour my second layer. So I poured out
more liquid plastic into the paper cup, added the hardner, mixed
it up real good with my pencil and then carefully poured the liquid plastic around
each of the glass marbles in the mold. I had to physically work out any
air bubbles that were trapped in the newly poured plastic with my
pencil before the new plastic set up. Watch for any undue shifting of
the object that you are embedding. Because resin is still liquid it
wants to flow and will take your your object or specimen with it. If
you see it shifting in the fresh poured resin then take
your pencil and straighten it back up.
It's ok to pour liquid plastic in layers. There will be no boundary
line between the base pour and the second pour, etc. It will all appear
as clear plastic. It's preferrable to pour it in layers because of the
heat and also because of the shrinkage during the hardening process.
In regards to the subsequent thickness of each layer in a large mold-
do not pour any water (to measure the amount as you did in the above
step) over the hardening base layer of plastic.
Instead, just guess at it. For a thinner layer, use a little less resin;
for a thicker layer, use a little more resin.
9. My next step was to pour four more layers of liquid plastic 4 hours
or more apart as the mold was 1 1/2 inches deep. You can place labels
printed on transparency film or on paper in between one of these layers.
The label will also then be embedded as well. Remember to place the label
face down and right side up as you did to your inanimate object.
10. After my last and final pour I had to wait for 48 hours for the
entire mass to finish hardening to maximum. Make sure it is dry before
you remove it from the mold. It is possible that sometimes the edges of the
hardened or cured
casting will shrink away from sides of the mold. If you tap the surface of the
casting with a pencil it should give you a solid sound in response if
it is dry. Then you can invert the mold, flex it's edges, and, hopefully,
the cast should gently drop onto a soft rag. If it is still tacky then
you might not want to handle the cast piece of plastic until it is completely dry.
But you are not finished yet. Now it is time to polish it up real pretty.
11. The top surface, once exposed to air, will remain tacky after the
48 hours of curing has taken place. Give it a little time to completely
harden as much as it is going to. Then go to the hardware store and buy
some wet-dry sand paper. Also buy a can of brasso (I used this in the
Navy to polish my uniform's brass belt buckle). You will need 3
different grades of sand paper: 200 grit, 400 grit, and 600 grit.
Start sanding the tacky surface of your finished product with the 200
grit sand paper. Then sand it with the 400 grit sand paper. Then sand it
with the 600 grit sand paper. Finish polishing it with the brasso (a
fine abrasive polish) or you can use some other similar polish.
I really enjoyed my creation. I had done a beautiful job and I was proud of myself.
12. Then I had to clean up my mess in my garage.
I had to throw away my newspapers. I had to make a new measuring cup
with the appropriate outside marks on it. I had to throw away the old one as it
had some plastic inside of it. I had to throw away my stirring pencil as
it had a big blob of dried plastic on the end of it. It's important to
keep your work area cleaned up for efficiency as well as for safety.
Small insects can be dryed easily. There are all kinds of ways of doing
this without using alcohol. If you just catch your insect and
immediately embed it in plastic without dealing
with the water content problem then you will probably get silvering.
This time let's do it a little different. I want a blue bottom layer but
I want the plastic on top of the bug to be clear. Remember that we are
working backwards so our base layer has to be clear resin. Then the
last layer that I pour will have to be blue.
Pour a thin layer of liquid plastic into the mold on top of the base layer. Then carefully
insert the bug upside down into the liquid resin being careful not to break it's
wings, antennae, or legs. Carefully push the bug all the way to the
bottom as it will have a tendency to float. Take the sharpened end of your pencil to work
out the surface bubbles. You can also use a long sharp nail or an ice pick if you
prefer. Use the eraser end of your pencil to work out any bubbles under
the butterfly's wings. If you break off a leg or antennae or wing
wait until the next pour to carefully fit it back on, letting the liquid resin help you
hold it in place. You might have to use a pair of tweezers to help you
move it around in the plastic.
So far, only half of the bug has been stuck to the plastic.
That's what you want. The resin will put out a certain amount of
heat while it is drying. This heat will also help dissipate any additional
water moisture that might be inside of the bug. When this happens the
moisture can escape through the upper end of the bug because it is not
covered with plastic yet. This way you let the heat from the plastic
resin work for you rather than against you. Let this set up for 4 hours
or so. Mix some more resin and then cover the bug entirely with it. Work
out any air bubbles that you may have.
Some embedders don't like to embed half of their bug at a time.
Here is a tip if you want to embed it all at once. Use one or two
drops less hardener here. This will allow the plastic to dry slower thus
putting out less heat. The insect may have a tendency to slide or float
in this layer so you need to check the casting frequently. It may
harden off-centered if you don't correct it. If it does float off-centered then
carefully take the eraser end of your pencil and move it back to center
again. You can only do this if the plastic has not set up yet. If the
plastic has set up then it is too late. You have to live with it because
there is nothing that you can do.
15. Now it's time to pour our last and final layer. Let's add a few drops of
blue coloring (pigment) to the liquid plastic that is in our paper
cup. We add the coloring and stir it into the resin before we add the
hardener. Then we add the hardener and stir it all up real good and then
pour it into the mold. Let this dry for 48 hours or so.
After you take your finished product out of the mold then you may want
to cut a small circular amount of felt cloth and glue it to the bottom
to make an attractive looking paper weight and conversation piece.
 13. So, let's pick out the round plastic mold that we want to use and measure the
amount of plastic that we want to use (as stated above). I want to make
a paper weight this time.
13. So, let's pick out the round plastic mold that we want to use and measure the
amount of plastic that we want to use (as stated above). I want to make
a paper weight this time.
 14. Now, here is the trick. We are only going to embed half of our bug
at a time. You don't want to place your bug on the hardened
base layer just yet. If you do you will likely get air bubbles underneath it.
14. Now, here is the trick. We are only going to embed half of our bug
at a time. You don't want to place your bug on the hardened
base layer just yet. If you do you will likely get air bubbles underneath it.


Preparing Your Specimen
16. Silvering and bubbles are the two major faults one has to overcome in this hobby.
Silvering happens when the abdomen shrinks away from the plastic. This
happens when the specimen is hardening in the plastic.
If you get
silvering then you can throw your specimen away because your work is
flawed. If you get silvering don't get discouraged. I don't think that
there is a hobbist in this field who has never silvered a specimen. It
happens to all of us at one point or another...
17. If you capture your specimen alive then you have to
"put it to sleep" before you embed
it in plastic. Putting it in the freezer overnight is one way to
humanely do this.
Some more examples of specimens to embed might include:
a crayfish, clam, frog, perch, starfish, or a worm.
18. The main problem with embedding your specimen is water content. I am not
talking about tap water that you drink. Rather, I am referring to the
water content inside of the specimen. Most water is found
in the abdominal cavity as part of it's abdominal juices. This water
problem has to be dealt with before you embed your specimen. This
water content is what is behind silvering. The water in the abdomen of
the specimen will shift or change thus taking away it's partial support
of the specimen's outer skin or covering. When this happens the skin or
outer covering will shrink away from the plastic that is around it
causing silvering to take place.
For a small bug specimen- make sure that it has been fully dried and that there is
little water moisture inside of it. This is not difficult for rather
small insects. However, this may prove difficult for rather large
insects. These insects do not dry easily, especially if you have a large
spider, a large moth, or a large grasshopper. If you try to dry these kinds then they will wind up
looking shriveled and deformed. This is not a good senario.
There are two ways to solve this problem on large species of insects,
for fish, reptiles and amphibians, as well.
19. The first method to get rid of water content is for you to be part taxidermist. A taxidermist
stuffs animals. Turn your specimen upside down and cut open it's abdominal cavity and
pull out it's guts with a pair of tweezers. Once the guts are removed you
can replace the abdominal cavity parts with dry packing material such as small
round pieces of toilet paper, napkins, or cotton balls.
Superglue or stitch the
incision back together after you have finished your operation.
These dry items inside of your specimen should hold the outer wall of the
abdomen in place against the plastic when it is poured against it.
This should keep silvering from taking place.
That really sounds yukky doesn't it! Who would want to do that?
Well, a lot of folks use alcohol instead and hope for the best that
it solves the silvering problem. You can do it this way but it's
risky. There is no guarantee that silvering won't take place
if you use alcohol. Want to try it anyway? Ok, here is how it works:


The Use of Alcohol In Plastic Embedding As A Hobby
20. The second method to get rid of water content is to soak
your specimen in alcohol. Why? Because you don't want silvering. Also
because you need to preserve your specimen against decay as long as you
can. This is especially true once your specimen is encased in hard plastic resin.
Basically, you should not use liquid alcohol on small insects or other
small specimens that you intend on immediately embedding as small
insects can dry well. Hard shelled specimens
usually embed well with little or no use of alcohol. This would
include a small crab, scorpion, or horned beetle. Give it the trial and
error method if you have any doubts.
21. What kind of alcohol is this?
Note: I don't believe in drinking any alcoholic beverage so I don't
recommend that you purchase it for that purpose. Ethanol is drinking or grain alcohol.
This is readily available at most drug stores but can be kind of
expensive. Be sure to ask your drug store pharmacist for the right product.
Make sure that it is 70%-95% in strength.
You might have to be 21 years old in the United States in order to purchase
it. Caution: keep it out of the reach of small children.
If you place your specimen in alcohol then it will start to
dehydrate the cells of your specimen. In other words tissue water is
replaced by the alcohol. This is good for long term preservation.
It is a common practice to make pickles out of cucumbers by soaking them
in a salt and vinegar mixture. This is referred to as pickling. Cell
soaking is a way to preserve the cucumber without refrigeration. A dill
pickle is made this way. I love a good salty dill pickle.
Cell soaking using alcohol works in nearly the same way.
"He is pickled" or "she got pickled last night" in the olden
days referred to adults who got "soaked" or drunk on
this kind of alcohol. Now you know where this expression came from.
Soaking in alcohol is optional for small specimens but is recommended
for large specimens. A large specimen is any that is over 1/2 inch in
thickness. It should be soaked for a couple of days. Make sure that your
specimen is completely submerged under the level of the alcohol. For instance, the lizard that I caught in the back yard was
considered a large specimen.
Here is another tip: if your specimen is 1/2 inch or more in thickness then take a
hyperdermic needle and syringe and inject alcohol into it's abdomen,
shoulders and hips. You have to do this because sometimes the
alcohol does not soak that far down into the deeper tissue without
your help. When finished, take your specimen out of the alcohol and
then let it drain real good overnight in the open on a paper towel.
As in the case with insects, water moisture inside of your specimen is
your worst enemy. You cannot dry these kinds of species as you dry an
insect without doing a lot of damage to your specimen.
22. I have the dead lizard. I don't care anything about cutting open it's
abdomen and stuffing it with dry material and then closing it back up.
So I am going to soak it in alcohol for two days before I embed it.
First, I soak the dead lizard real good in alcohol. I let it soak
for over 48 hours or so. I inject alcohol through a hyperdermic
needle into each of it's shoulders and hips. I take an eye dropper and
force the liquid down it's throat. I want every part of this specimen
thoroughly soaked to the hilt so to speak.
I remove my specimen from the soaking
jar, place it on a paper towel, and leave it overnight to drain real
good. The next day I am ready to embed it.
23. The mold that I pick this time is a large mold that is "right side
up" so to speak. In other words I don't have to turn my specimen
upside down in order to embed it. The mold is like a large bowl. I apply the
mold release real good to the mold. Then I measure out the plastic
resin, mix it with the hardener, and pour the base layer. I want the
base layer clear because I want others to be able to look at the belly of the
lizard. It is a blue-bellied lizard and unique in this respect.
I next pour a thin layer of liquid plasic on top of the base layer. I
insert the lizard inside of the mold and curl his tail around so no
part of it's tail is touching any part of the mold. I work out any air
bubbles that may be around the bottom of the lizard. Then I give it a
couple of hours to set up. Up to this point only the bottom part of the
lizard and his feet are touching any of the plastic resin. Now the resin
is pretty firm and I can be assured that the lizard is not going to
float around or drift in any more of the resin that I pour.
24. One secret here is to try to reduce the amount of heat that the
hardening plastic is giving off. The best way to do this is to pour thin
layers at a time. Say, only 1/8 inch thick at a time. Remember that too
much heat all at once will affect the moisture content inside of the
specimen. This heat will affect the liquid alcohol in
the specimen in nearly the same way that it would have affected the water
moisture in the specimen if you had not treated it. Just keep on pouring
one thin layer after another with about 4 hours or so in between the
pouring of each layer. Then finish covering your specimen with resin.
Let the entire work dry for about 2 full days or so.
If you get silvering then you know you did something wrong. Try it again
on another specimen using the trial and error method until you get a
good specimen without silvering. Keep notes if you have to on each of
your experiments until you find the way that works best for you.
This is not rubbing alcohol (isopropryl alcohol).
Rather, it is called denatured ethanol. Because of it's dehydration and other
properties it is considered poisonous to one's body.
 Steps On How To Embed A Reptile, an Amphibian, or a Fish


Most of the time the plastic came out pretty easy and I could
reuse the mold over and over again. But one time I had a mold that
would not release from the dried plastic resin. I tried a number of ways
to free it but nothing seemed to work. As a last resort I had to take a
thick knife and insert it between the plastic mold and the plastic resin.
I got it freed, however, I ruined the mold.
I want to stress the importance of pouring thin layers of resin rather
than thick layers due to the heat that the resin produces. Pouring a
thick layer over a specimen may discolor your specimen. This is not a good scenario.
Pouring a thin layer promotes slow hardening which is much better.
If you feel creative you might want to make your own latex mold
or two. Brush a coat of latex rubber over an object that you are
interested in. After that has dried you can brush on several more coats,
one at a time. Make sure each coat is at least 1/8 inch in thickness.
You might have to support this mold on a frame of some kind
so your mold doesn't collapse when you add the heavy resin to it.
You can make a frame from cardboard, popsicle sticks, or you can also use play-dough clay.

Conclusion
I hope that I have shared something with you that might have helped
you in this fun and rewarding hobby. I thoroughly enjoyed this hobby
when I was doing it.
Some explorers have discovered bugs and other items from long ago on
this planet that were embedded in resin or tree sap. In those days
pitch preserved some specimens. It's fun to look at these samples but
it is more fun to look at the items that you have embedded.
I embedded such things as sea shells, marbles, and
my Eagle Scout medal. I embedded a big black beetle, a scorpion, and a
lizard. I colored some of the resin that I used. I poured some thick layers and I
poured some thin layers. I made my mistakes from which I learned from.
I guess that it is all part of the learning process. So, no matter how
you embed your specimens in plastic, have fun with your hobby. You deserve it.


Click Here- An Important Link For You To Click On


As of August 1, 2005
